春风十里不如你 —— Taozi - linux 2023-03-27T23:41:04+08:00 Typecho https://www.xiongan.host/index.php/feed/atom/tag/linux/ <![CDATA[【Hive】Hadoop下的部署(未上接)]]> https://www.xiongan.host/index.php/archives/194/ 2023-03-27T23:41:04+08:00 2023-03-27T23:41:04+08:00 admin https://www.xiongan.host Hive的部署

MySQL安装

安装

首先上传mysql数据库的rpm压缩包到主机/opt/software

image-20230327163403445

//解压缩包到当前目录中
[root@master-tz software]# unzip mysql-5.7.18.zip
//进入到rpm软件目录中,首先检查mariadb,如果有就要卸载

image-20230327163858423

//安装数据库
[root@master-tz mysql-5.7.18]# rpm -ivh mysql-community-common-5.7.18-1.el7.x86_64.rpm
[root@master-tz mysql-5.7.18]# rpm -ivh mysql-community-libs-5.7.18-1.el7.x86_64.rpm
[root@master-tz mysql-5.7.18]# rpm -ivh mysql-community-client-5.7.18-1.el7.x86_64.rpm
//安装下面的rpm需要首先安装perl软件
[root@master-tz mysql-5.7.18]# yum install -y net-tools perl
[root@master-tz mysql-5.7.18]# rpm -ivh mysql-community-server-5.7.18-1.el7.x86_64.rpm

配置

修改配置文件/etc/my.cnf

vim /etc/my.cnf
//最后添加五行
default-storage-engine=innodb
innodb_file_per_table
collation-server=utf8_general_ci
init-connect='SET NAMES utf8'
character-set-server=utf8
//最后保存退出

image-20230327164618444

启动

[root@master-tz mysql-5.7.18]# systemctl start mysqld
[root@master-tz mysql-5.7.18]# systemctl status mysqld

image-20230327164839744

查看MySQL初始密码

[root@master-tz mysql-5.7.18]# cat /var/log/mysqld.log | grep password
2023-03-27T08:52:43.074230Z 1 [Note] A temporary password is generated for root@localhost: KbVXiHlul3:> //查看初始密码,下方需要填写
[root@master-tz mysql-5.7.18]# mysql_secure_installation //重新设定密码,并把密码设置为Password123$
//注:允许远程连接设定为n,表示允许远程连接,其它设定为y

除了以下是n其他都是y

image-20230327165755870

登录数据库客户端

[root@master-tz mysql-5.7.18]# mysql -uroot -pPassword123$

image-20230327165944986

新建hive用户与元数据

mysql>create database hive_db;
mysql>create user hive identified by 'Password123$';
mysql>grant all privileges on *.* to hive@'%' identified by 'Password123$' with grant
option ;
mysql>grant all privileges on *.* to 'root'@'%'identified by 'Password123$' with grant
option;
mysql>flush privileges;

Hive安装

安装

首先将hive的压缩包上传到虚拟机,并解压,重命名hive,设置hive权限

[root@master-tz ~]# tar -zxf apache-hive-2.0.0-bin.tar.gz -C /usr/local/src/
[root@master-tz ~]# cd /usr/local/src/
[root@master-tz src]# mv apache-hive-2.0.0-bin/ hive
[root@master-tz src]# chown -R hadoop:hadoop hive/

修改环境变量

[root@master-tz src]# vim /etc/profile
# set Hive environment
export HIVE_HOME=/usr/local/src/hive # Hive安装目录
export PATH=$HIVE_HOME/bin:$PATH # 添加将Hive的bin目录
export HIVE_CONF_DIR=$HIVE_HOME/conf #Hive的环境变量
[root@master-tz src]# source /etc/profile

修改配置文件

hive-site.xml文件

首先切换到hadoop用户

[hadoop@master-tz conf]$ cd /usr/local/src/hive/conf
[hadoop@master-tz conf]$ vim hive-site.xml
<?xml version="1.0" encoding="UTF-8" standalone="no"?>
<?xml-stylesheet type="text/xsl" href="configuration.xsl"?>
<configuration>
<!--元数据库地址-->
<property>
<name>javax.jdo.option.ConnectionURL</name>
<value>jdbc:mysql://master-tz:3306/hive_db?createDatabaseIfNotExist=true</value>
</property>
<!--mysql用户名-->
<property>
<name>javax.jdo.option.ConnectionUserName</name>
<value>hive</value>
</property>
<!--mysql中hive用户密码-->
<property>
<name>javax.jdo.option.ConnectionPassword</name>
<value>Password123$</value>
</property>
<!--mysql驱动-->
<property>
<name>javax.jdo.option.ConnectionDriverName</name>
<value>com.mysql.jdbc.Driver</value>
</property>
<property>
<name>hive.downloaded.resources.dir</name>
<value>/usr/local/src/hive/tmp</value>
</property>
<property>
<name>hive.exec.local.scratchdir</name>
<value>/usr/local/src/hive/tmp/${hive.session.id}_resources</value>
</property>
<property>
<name>hive.querylog.location</name>
<value>/usr/local/src/hive/tmp</value>
</property>
<property>
<name>hive.server2.logging.operation.log.location</name>
<value>/usr/local/src/hive/tmp/operation_logs</value>
</property>
<property>
<name>hive.server2.webui.host</name>
<value>master-tz</value>
</property>
<property>
<name>hive.server2.webui.port</name>
<value>10002</value>
</property>
</configuration>

hive-env.sh

[hadoop@master-tz conf]$ cp hive-env.sh.template hive-env.sh
[hadoop@master-tz conf]$ vim hive-env.sh
//增加如下配置项
# Set JAVA
export JAVA_HOME=/usr/local/src/java
# Set HADOOP_HOME to point to a specific hadoop install directory
export HADOOP_HOME=/usr/local/src/hadoop
# Hive Configuration Directory can be controlled by:
export HIVE_CONF_DIR=/usr/local/src/hive/conf
# Folder containing extra ibraries required for hive compilation/execution can be
controlled by:
export HIVE_AUX_JARS_PATH=/usr/local/src/hive/lib

MySQL的驱动jar包上传至虚拟机,然后将该jar包复制到hive安装路径下的lib文件夹中

[root@master-tz software]# cp mysql-connector-java-5.1.46.jar /usr/local/src/hive/lib/

确保hadoop集群正常,然后初始化hive元数据库

[hadoop@master-tz conf]$ schematool -initSchema -dbType mysql

image-20230327174225761

进入hive shell界面

[hadoop@master-tz ~]$ hive
hive>

如果出现以下情况

image-20230327174414446

则需要去hive-site.xml配置文件修改为

<value>jdbc:mysql://master-tz:3306/hive_db?createDatabaseIfNotExist=true&useSSL=false</value>

image-20230327174701459

]]>
<![CDATA[【Zabbix】部署监控软件]]> https://www.xiongan.host/index.php/archives/190/ 2022-12-15T17:43:00+08:00 2022-12-15T17:43:00+08:00 admin https://www.xiongan.host 介绍
zabbix是一个监控软件,其可以监控各种网络参数,保证企业服务架构安全运营,同时支持灵活的告警机制,可以使得运维人员快速定位故障、解决问题。zabbix支持分布式功能,支持复杂架构下的监控解决方案,也支持web页面,为主机监控提供了良好直观的展现。

部署

安装httpd和php7

服务端:

[root@srv-tz ~]# yum install -y

[root@srv-tz ~]# systemctl enable --now httpd

客户端:

[root@client01 ~]# yum install -y yum-plugin-priorities && yum install http://rpms.famillecollet.com/enterprise/remi-release-7.rpm -y
#修改repo配置文件
[root@client01 ~]# sed -i -e "s/\]$/\]\npriority=10/g" /etc/yum.repos.d/remi-safe.repo
[root@client01 ~]# sed -i -e "s/enabled=1/enabled=0/g" /etc/yum.repos.d/remi-safe.repo
#安装php扩展
[root@client01 ~]# yum --enablerepo=remi-safe,epel install php72 php72-php-pear php72-php-mbstring -y
#启动和自启php
[root@client01 ~]# scl enable php72 bash
#查看php版本信息
[root@client01 ~]# php -v
PHP 7.2.34 (cli) (built: Oct 24 2022 10:27:24) ( NTS )
Copyright (c) 1997-2018 The PHP Group
Zend Engine v3.2.0, Copyright (c) 1998-2018 Zend Technologies
编辑脚本文件
[root@client01 ~]# vim /etc/profile.d/php72.sh
#!/bin/bash
source /opt/remi/php72/enable
export X_SCLS="`scl enable php72 'echo $X_SCLS'`"
#安装php从remi源中
[root@client01 ~]# yum --enablerepo=remi-safe,epel -y install php72-php
[root@client01 ~]# systemctl enable --now httpd
#写入页面
[root@client01 ~]# echo '<?php phpinfo(); ?>' > /var/www/html/info.php
#查看页面
[root@client01 ~]# curl http://localhost/info.php | grep 'PHP Version' | tail -1 | sed --e 's/<[^>]*>//g'
  % Total    % Received % Xferd  Average Speed   Time    Time     Time  Current
                                 Dload  Upload   Total   Spent    Left  Speed
100 69230    0 69230    0     0  6822k      0 --:--:-- --:--:-- --:--:-- 7511k
PHP Version 7.2.34

phpinfo

安装及配置 MariaDB

安装环境

服务端:

[root@srv-tz ~]# yum install centos-release-scl-rh centos-release-scl -y
#修改配置文件
[root@srv-tz ~]# sed -i -e "s/\]$/\]\npriority=10/g" /etc/yum.repos.d/CentOS-SCLo-scl.repo
[root@srv-tz ~]# sed -i -e "s/\]$/\]\npriority=10/g" /etc/yum.repos.d/CentOS-SCLo-scl-rh.repo
[root@srv-tz ~]# sed -i -e "s/enabled=1/enabled=0/g" /etc/yum.repos.d/CentOS-SCLo-scl.repo 
[root@srv-tz ~]# sed -i -e "s/enabled=1/enabled=0/g" /etc/yum.repos.d/CentOS-SCLo-scl-rh.repo
#安装
[root@srv-tz ~]# yum --enablerepo=centos-sclo-rh install rh-mariadb103-mariadb-server -y

启用 MariaDB 环境

#运行mariadb
[root@srv-tz ~]# scl enable rh-mariadb103 bash
#查看版本
[root@srv-tz ~]# mysql -V
mysql  Ver 15.1 Distrib 10.3.35-MariaDB, for Linux (x86_64) using  EditLine wrapper
#写脚本
[root@srv-tz ~]# vim /etc/profile.d/rh-mariadb103.sh
#!/bin/bash
source /opt/rh/rh-mariadb103/enable
export X_SCLS="`scl enable rh-mariadb103 'echo $X_SCLS'`"
#启动运行
[root@srv-tz my.cnf.d]# systemctl enable --now rh-mariadb103-mariadb
#开始部署安装
[root@srv-tz my.cnf.d]# mysql_secure_installation
开始需要设置一个密码
按照提示进行确认即可最后会提示安装成功
All done!  If you've completed all of the above steps, your MariaDB
installation should now be secure.

Thanks for using MariaDB!

安装 Zabbix Server

[root@srv-tz ~]# yum install https://repo.zabbix.com/zabbix/5.0/rhel/7/x86_64/zabbix-release-5.0-1.el7.noarch.rpm -y
[root@srv-tz ~]# yum-config-manager --enable zabbix-frontend
[root@srv-tz ~]# yum --enablerepo=centos-sclo-rh install zabbix-server-mysql zabbix-web-mysql-scl zabbix-apache-conf-scl zabbix-agent zabbix-get -y

配置 Zabbix Server

配置 Zabbix Server 数据库

#登录数据库
[root@srv-tz ~]# mysql -uroot -p123456
MariaDB [(none)]> create database zabbix character set utf8 collate utf8_bin;
Query OK, 1 row affected (0.001 sec)

MariaDB [(none)]> grant all privileges on zabbix.* to zabbix@'localhost' identified by 'password';
Query OK, 0 rows affected (0.028 sec)

MariaDB [(none)]> flush privileges;
Query OK, 0 rows affected (0.001 sec)
[root@srv-tz ~]# cd /usr/share/doc/zabbix-server-mysql-5.0.30/
[root@srv-tz zabbix-server-mysql-5.0.30]# ls
AUTHORS  ChangeLog  COPYING  create.sql.gz  double.sql  NEWS  README
[root@srv-tz zabbix-server-mysql-5.0.30]# gunzip create.sql.gz
[root@srv-tz zabbix-server-mysql-5.0.30]# mysql -u root -p zabbix < create.sql
输入密码123456

设置SElinux

[root@srv-tz ~]# setsebool -P zabbix_can_network on
[root@srv-tz ~]# setsebool -P httpd_can_connect_zabbix on
[root@srv-tz ~]# setsebool -P domain_can_mmap_files on
[root@srv-tz ~]# setsebool -P daemons_enable_cluster_mode on
[root@srv-tz ~]# vim zabbix_server.te
module zabbix_server 1.0;

require {
 type zabbix_t;
 type zabbix_agent_t;
 type rpm_exec_t;
 type rpm_var_lib_t;
 class file { execute execute_no_trans map open };
 class capability dac_override;
}

#============= zabbix_t ==============
allow zabbix_t self:capability dac_override;

#============= zabbix_agent_t ==============
allow zabbix_agent_t rpm_var_lib_t:file open;
allow zabbix_agent_t rpm_exec_t:file { execute execute_no_trans map };
[root@srv-tz ~]# checkmodule -m -M -o zabbix_server.mod zabbix_server.te 
checkmodule:  loading policy configuration from zabbix_server.te
checkmodule:  policy configuration loaded
checkmodule:  writing binary representation (version 19) to zabbix_server.mod
[root@srv-tz ~]# semodule_package --outfile zabbix_server.pp --module zabbix_server.mod
[root@srv-tz ~]# semodule -i zabbix_server.pp

Firewall设置

[root@srv-tz ~]# firewall-cmd --add-service={http,https} --permanent
success
[root@srv-tz ~]# firewall-cmd --add-port={10050/tcp,10051/tcp} --permanent
success
[root@srv-tz ~]# firewall-cmd --reload
success

配置 Zabbix Agentd

[root@srv-tz ~]# vim /etc/zabbix/zabbix_agentd.conf
//* 更改 117 行,指定 Zabbix Server 的 IP
Server=127.0.0.1
//* 更改 158 行,指定 Zabbix Server 的 IP
ServerActive=127.0.0.1
//* 更改 169 行,指定 Zabbix Server 的 FQDN
Hostname=srv-tz
[root@srv-tz ~]# systemctl enable --now zabbix-agent

为 Zabbix Server 配置 httpd 服务

[root@srv-tz ~]# vim /etc/httpd/conf.d/zabbix.conf
//* 更改 10 行,允许指定网络访问
 #Require all granted
 Require ip 127.0.0.1 192.168.123.0/24
#定义 zabbix 的 timezone
[root@srv-tz ~]# vim /etc/opt/rh/rh-php72/php-fpm.d/zabbix.conf
//* 更改 24 行
php_value[date.timezone] = Asia/Shanghai
[root@srv-tz ~]# systemctl enable --now httpd rh-php72-php-fpm

访问web

http:ip/zabbix

进行页面安装

配置数据库 账号zabbix 密码为password

安装成功后默认账号Admin 密码zabbix

web

]]>
<![CDATA[【ansible】linux下的集群管理服务]]> https://www.xiongan.host/index.php/archives/137/ 2022-11-08T17:33:00+08:00 2022-11-08T17:33:00+08:00 admin https://www.xiongan.host 介绍

ansible是新出现的自动化运维工具,基于Python开发,集合了众多运维工具(puppet、cfengine、chef、func、fabric)的优点,实现了批量系统配置、批量程序部署、批量运行命令等功能。Ansible架构相对比较简单,仅需通过SSH连接客户机执行任务即可

主机名ip角色
Server192.168.123.195主控
Backend01192.168.123.196被控01
Backend02192.168.123.197被控02

安装ansible

准备eple源

这边使用的是阿里云的源

wget -O /etc/yum.repos.d/epel.repo https://mirrors.aliyun.com/repo/epel-7.repo

下载完成后就可以安装ansible服务

yum install -y ansible openssh-clients

配置ansible

修改配置文件

 vim /etc/ansible/ansible.cfg
  //* 71 行,取消注释。开启关闭对未连接的主机 SSH 秘钥检测
  host_key_checking = False

编写 Ansible 主机管理文件

mv /etc/ansible/hosts /etc/ansible/hosts.bak ##先备份一下内容
vi /etc/ansible/hosts ##建立目标群组,并写入被管机(目标服务器)的 IP/FQDN
[tz1101]
backend01
backend02

测试连通性

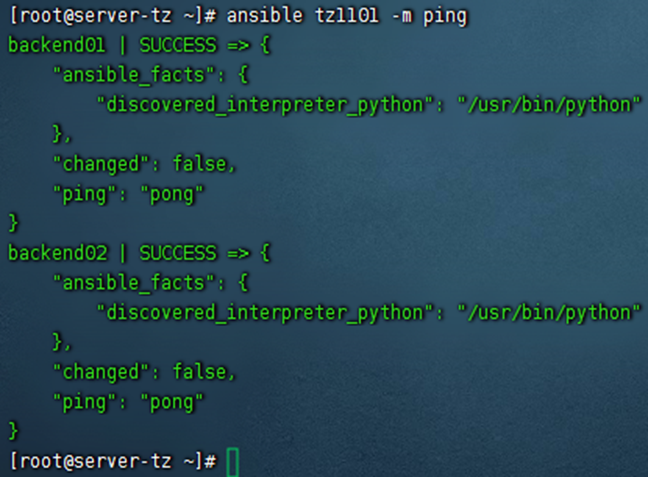
ansible tz1101 -m ping

test-ping

Tip:配置ssh免密才可以出现上面结果的

配置ssh免密登陆

ssh-keygen

一路回车,默认免密通信

ssh-copy-id ip/主机名

把密钥发送到集群主机中

另外在需要/etc/hosts中写入主机名和ip

/etc/hosts

ansible应用

添加用户

为集群主机添加单独用户

ansible tz1101 -m user -a 'name=tao state=present'

添加完成用户后再设置一个密码,在server端用pip python 生成哈希密码

首先安装pip python

yum install python-pip -y

生成密码

ansible tz1101 -m user -a 'name=tao password=tarRU/F9EJjRU update_password=always'

查看一下

user

playbook剧本

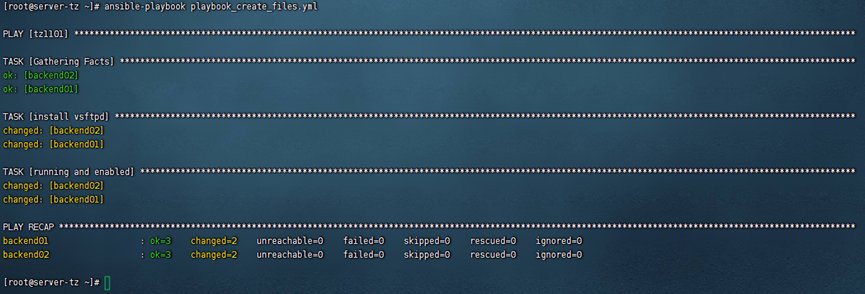
测试集群安装一个httpd软件的playbook剧本

vim playbook_create_install.yml #编写剧本文件→安装软件
- hosts: tz1101 #集群组名
  tasks:
    - name: install vsftpd ##任务名称
      yum: name=vsftpd state=installed ##安装vsftpd
    - name: running and enabled
      service: name=vsftpd state=started enabled=yes ##设置开机自启动

httpd

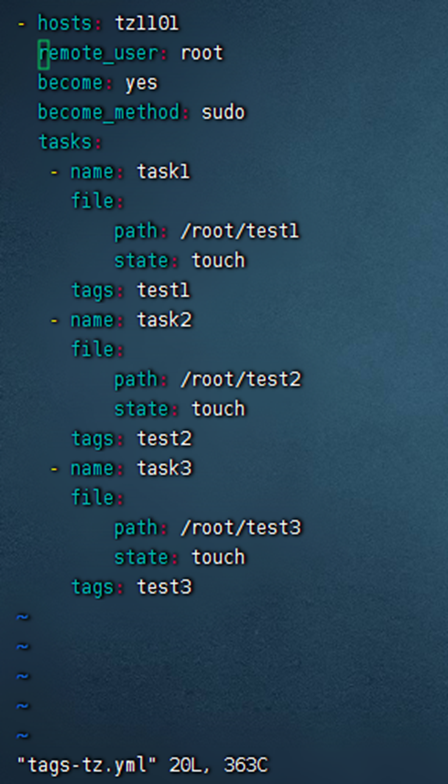
使用tag标签

创建tag文件yml

tag

注:自定义了tag,他就会只执行带有tag=test2的内容其他标签内容不会执行

使用变量

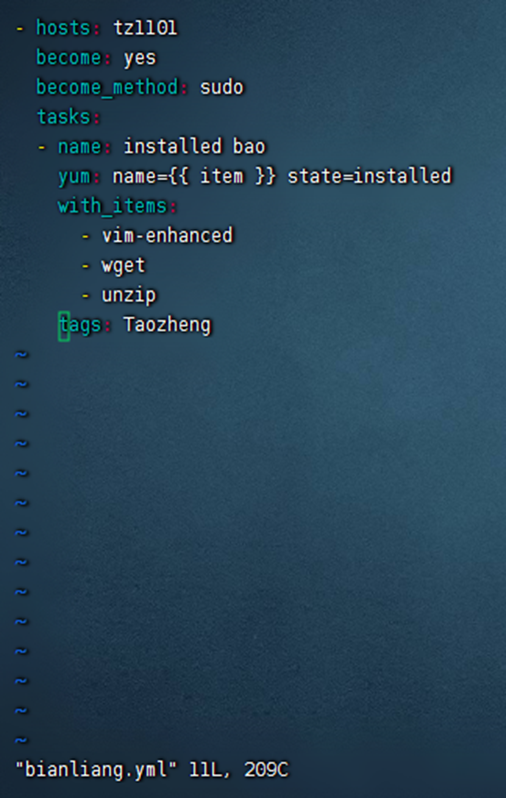
自定义变量安装服务

- hosts: tz1101
  become: yes
  become_method: sudo
  tasks:
  - name: installed bao
    yum: name={{ item }} state=installed
    with_items:
      - vim-enhanced ##软件名
      - wget
      - unzip
    tags: Taozheng

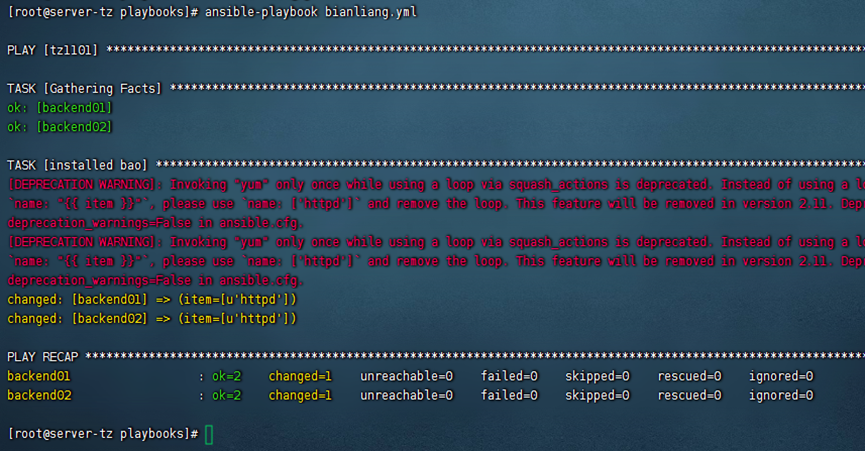
bianliang

ansible-playbook bianliang.yml

bianliang

roles

内网中需要关闭防火墙和selinux

ansible tz1101 -a "setenforce 0 && systemctl stop firewalld"

在当前server主机内安装tree服务

yum install -y tree

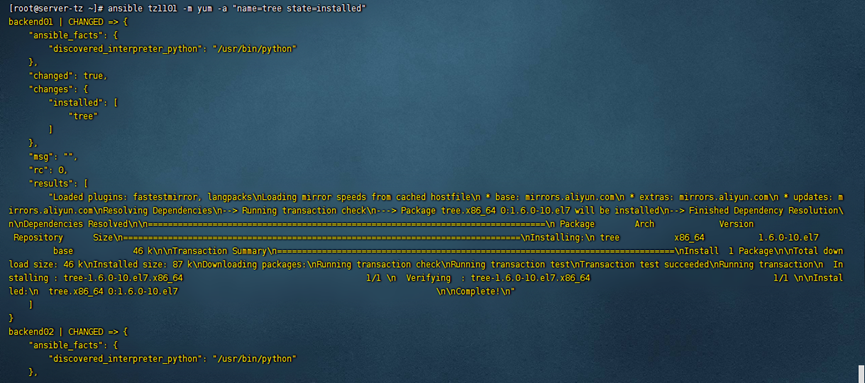
群组下的主机也要安装tree软件

ansible tz1101 -m yum -a "name=tree state=installed"/*-m 使用模块 yum命令 -a是具体内容 name是tree state是操作安装

tree

创建roles子目录及内容

mkdir -p roles/ins_httpd/{files,tasks,vars}

回到roles,编写一个yml文件

Vim playbook_httpd.yml
- hosts: tz1101
  roles:
      - ins_httpd
编写vars下的main文件
vim roles/ins_httpd/vars/main.yml
packages:
 - httpd

创建任务剧本

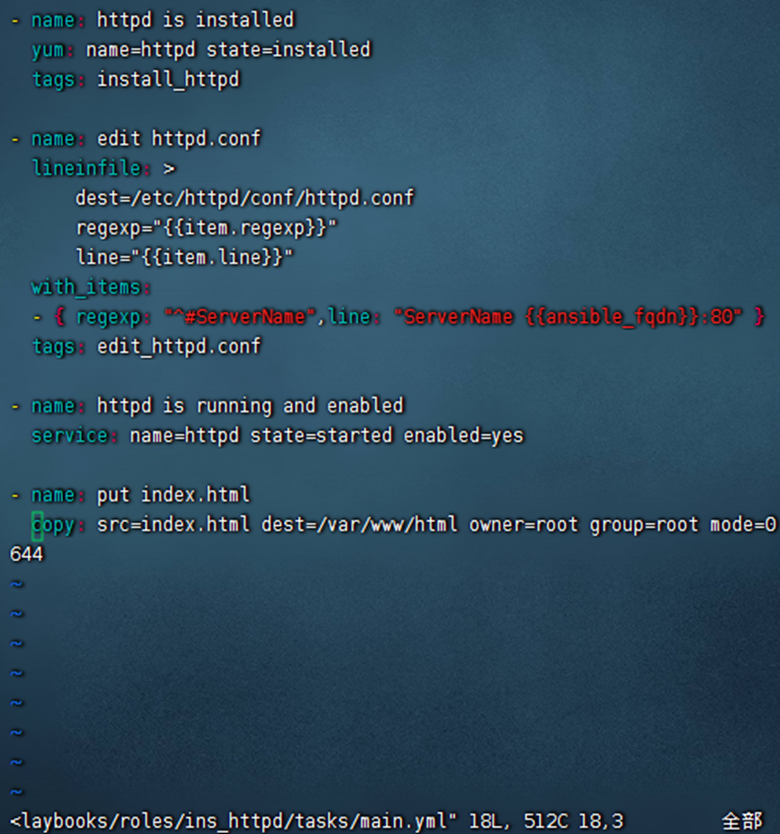
编写tasks下的main文件
vim roles/ins_httpd/tasks/main.yml
- name: httpd is installed
  yum: name=httpd state=installed
  tags: install_httpd

- name: edit httpd.conf
  lineinfile: >
      dest=/etc/httpd/conf/httpd.conf
      regexp="{{item.regexp}}"
      line="{{item.line}}"
  with_items:
  - { regexp: "^#ServerName",line: "ServerName {{ansible_fqdn}}:80" }
  tags: edit_httpd.conf

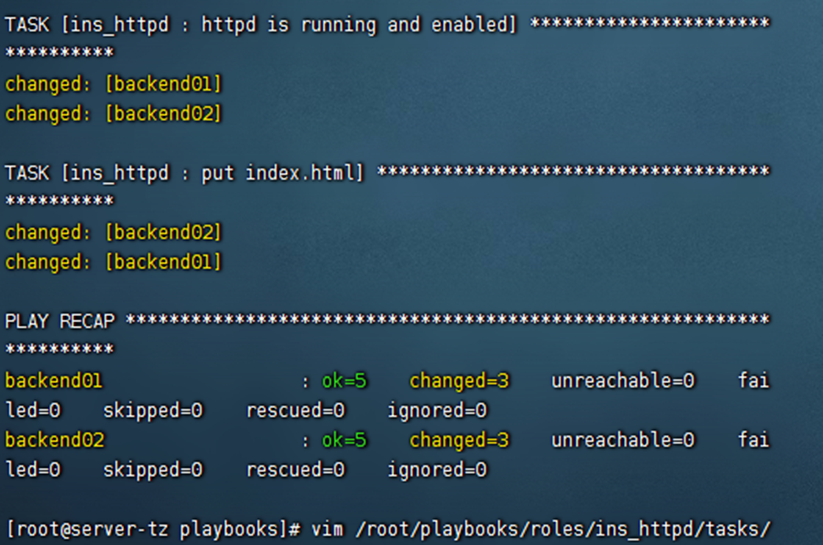
- name: httpd is running and enabled
  service: name=httpd state=started enabled=yes

- name: put index.html
  copy: src=index.html dest=/var/www/html owner=root group=root mode=0644

playbook

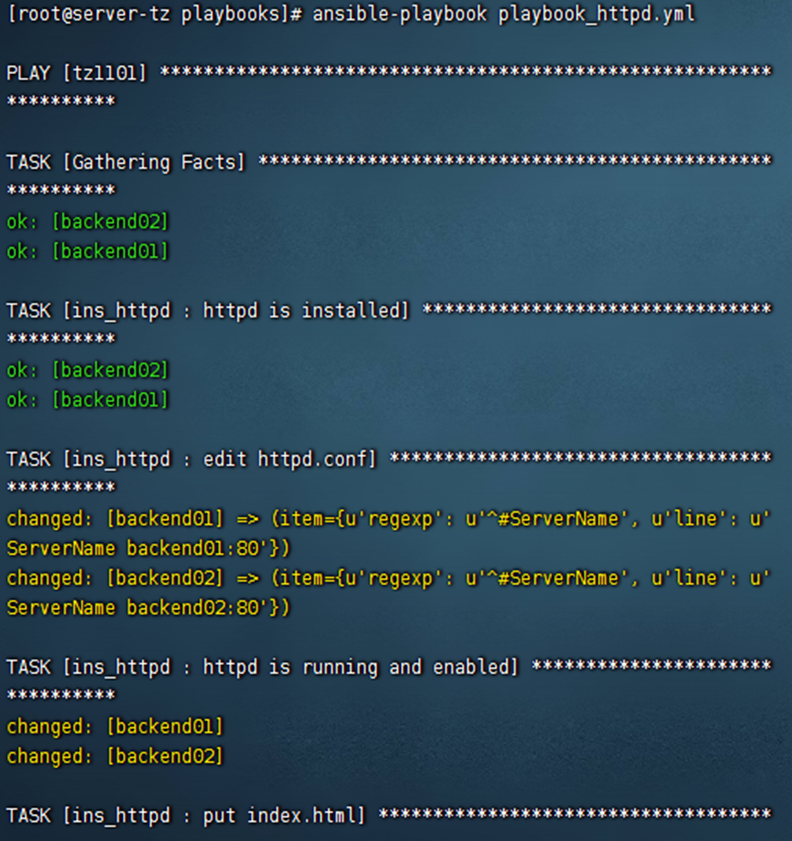
执行剧本

ansible-playbook playbook_httpd.yml

role

role

查看写入的httpd的index.html

ansible tz1101 -m shell -a "curl localhost"

image.png

]]>